A script of mine was published on SQL Server Central: http://www.sqlservercentral.com/scripts/powershell/108915/
Reader swebster wanted a more detailed instruction of how to use this script. So here you go:
Step 1: Copy the script from SqlServerCentral: http://www.sqlservercentral.com/scripts/powershell/108915/
Copy the complete script (notice there is a scrollbar on the right side), make sure the first line is $ErrorActionPreference=”Stop” and last line is a single }

Step 2: In your folder, create a file called csv.txt then rename it to csv.ps1. If you’re not familiar with how to renaming an extension, read this.

Step 3: Open csv.ps1 with NotePad or any other text editing software. Copy the sript and paste it in the csv.ps file. Save it after. It should look like this:

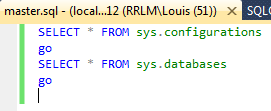
Step 4: Save your SQL Server script in the same folder and make sure you have access to your database using Windows Authentication.
Step 5: Open Windows PowerShell, go to your folder:

Step 6: Run following command (Note: you need to use .\ before the filename, just like Linux does)
.\csv.ps .\SQL2012 master master.sql

Step 7: Now you can view the results using your favorite tool:


Enjoy!
